
This evening my 6th grade daughter asked for some help creating a photograph she needed for a printed program she’s making for drama class. In this post, I’ll explain how we used Keynote ’09 and Seashore software (Seashore is free/open source) to create a “green screen” effect that made it look like her sister was in a location she’s never actually visited. The photo collage below (created with Diptic on an iPad) shows the progression of images we used and created.
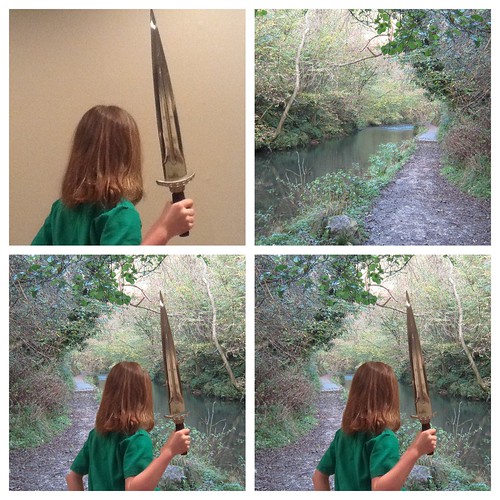
After talking with her drama instructor, Sarah decided she wanted a photo for her program of a person holding a sword, standing in front of a river. She’s creating a theater program for “Mother Hicks,” by Suzan Zeder. Earlier in the evening, Sarah took a series of photos with an iPad of her sister holding a sword, in front of a tan wall in our house. This is the most consistent background we have available, which can serve as a “green screen” in a photo. This means the background is relatively similar in color and can be removed from an image.
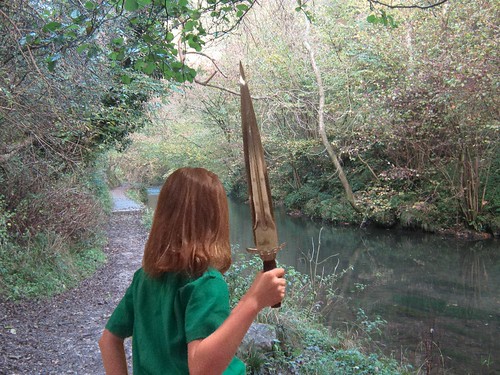
Sarah selected one of the photos she liked from the series she took, and then we searched Flickr images licensed under Creative Commons Attribution-Only for photos of a stream. Sarah liked “River Dove, Dovedale, Derbyshire” by Eamon Curry. With both these images in hand, it was time to merge them and use a little “green screen” magic.
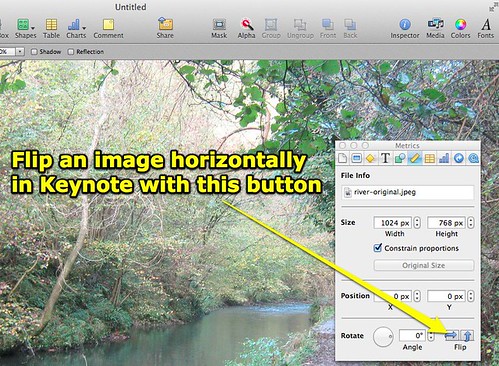
I haven’t had a copy of Adobe PhotoShop since 2006 when I last worked for a university, so to merge these photos I had to use available software on my Mac. This meant Keynote and Seashore. The first step was bringing the stream photo (to be used as a background image) into a new Keynote presentation slide. Since the photo of Rachel we wanted to overlay has her on the left side of the frame facing to the right, we needed to “flip” one of the photos so she’d be on the path in the background photo facing towards the center of the image. We chose to flip the background image, using the “Flip” button at the bottom of the “ruler” tab in the Keynote inspection window.
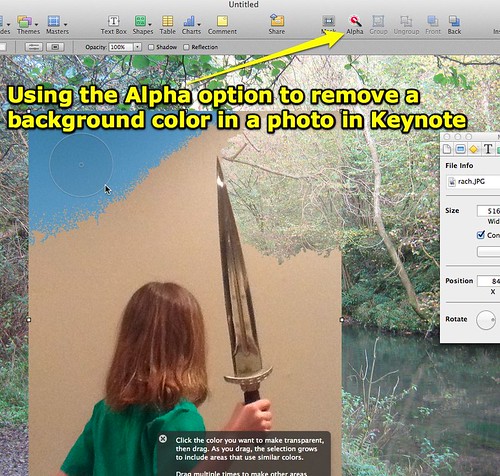
Next we dragged the photo of Rachel holding the sword onto the Keynote slide and sized it as desired, using the corner handles. With Rachel’s photo selected, we clicked the “Alpha” button and then clicked-and-dragged over the tan background to “select it out” of the image. This took some experimenting, if we selected too many pixels it would remove part of the sword or Rachel. This is where it’s important to have an evenly lit background, which is serving as a “green screen.”
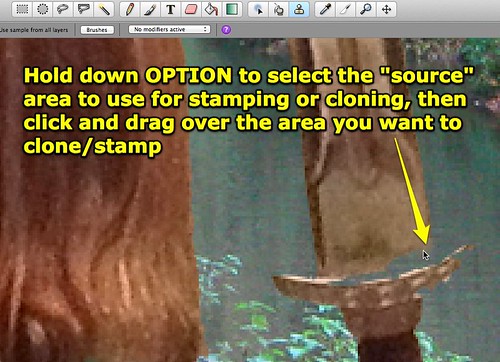
After finishing those selections, we noticed there were a few places where parts of the image we wanted to KEEP had been erased with the alpha channel. To fix this, we opened the image in Seashore and selected the STAMP tool. This is similar to the CLONE tool in PhotoShop. First we selected a small brush size, and used the magnifying glass to zoom in to the part of the image we wanted to repair.
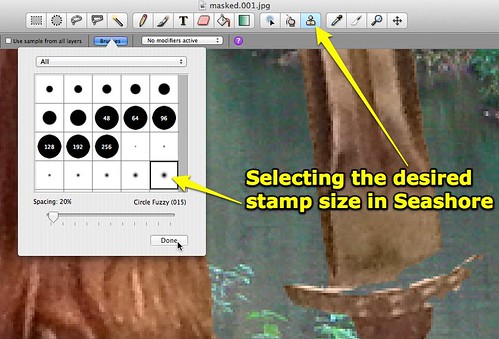
Next, we held down the OPTION key and clicked on the part of the image we wanted to use as the “source” or master area for the cloned/stamped part. Then we clicked on the part of the image we wanted to repair, like this part of the sword just above the hilt.
When we finished repairing about four areas of the photo, we pronounced it finished! We exported a high resolution JPG version from Seashore, and Sarah imported it into her brochure she created with Pages. She was very excited to learn how to do this tonight, and was pleased with the final result.
Do you have other favorite software programs or techniques (other than Adobe PhotoShop) which you like to use for “green screen” and image repair/cloning tasks like these? If you have a Mac and Keynote software, give this a try sometime. Seashore is free.
Technorati Tags: apple, green, software, screen, seashore, effects, clone, stamp, keynote
Comments
2 responses to “Green Screen Photo Effects On The Cheap”
Photoshop Elements is pretty cheap and can do most of what the full version does, minus Layer Styles.