
Friday evening my son and I played more Minecraft together, and my steep learning curve working with this 15 year old Minecraft expert continued. For part 1 see my March 3rd post, “First Lesson in Minecraft (and why I waited a year to ask my son to teach me).” I took screenshots throughout our Minecraft adventures, so I’d have some visual documentation of “lessons learned” that I could share. I’m writing these posts both to help reinforce my own learning as well as share it with you. For a video explanation of Minecraft, see Alex’s October 2012 video presentation for K-12 Online, “Creating and Playing in Minecraft.”
One of the most important things I learned in Minecraft this weekend is that it’s important to “craft” a bed for yourself and sleep in it overnight, so you can change the spot where your Minecraft character regenerates or “spawns” when you die.
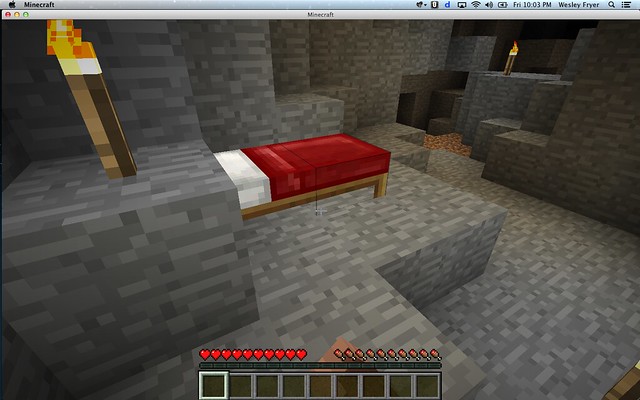
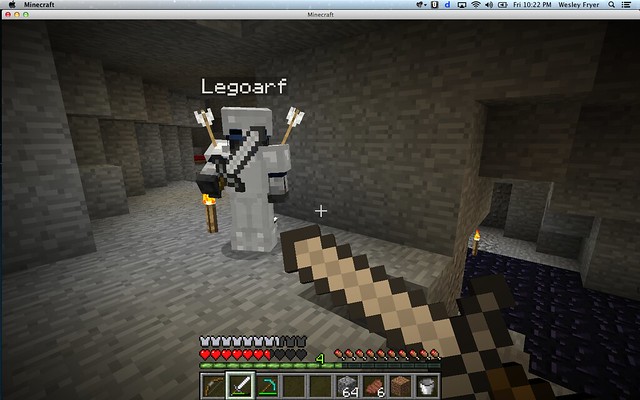
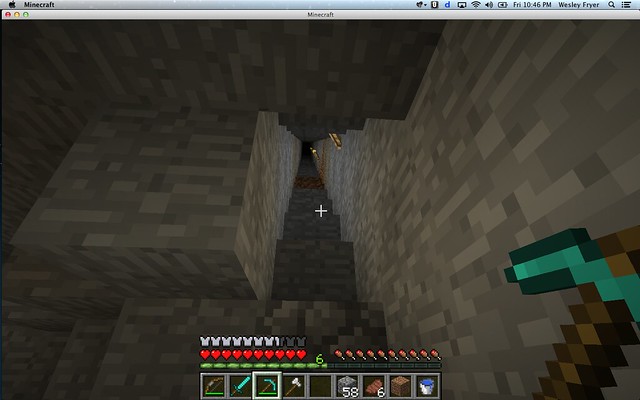
Friday night Alex and I left the surface and went caving to gather resources and build up our inventory of items we both found and crafted/created. Since you can encounter “hostile mobs” at any time (creatures which can attack and kill you) when you’re playing in “survival mode,” as we were, it’s important to remember to create a new bed and sleep in it when you venture far away from your original spawning location. Thankfully, just before I fell into some lava and died, I asked Alex to build me a bed and I slept in it. This allowed me to regenerate underground close to his location, instead of all the way back at the surface. You can see that I recently regenerated in the screenshot below, because I don’t have ANY items in my “hot bar” inventory. Since I died in lava, however, all my supplies were consumed/destroyed and could not be recovered. This was a real bummer.
This is one reason it’s GREAT to play Minecraft together and with a more experienced family member or friend. When I regenerated I didn’t have a sword, pick axe, or anything else. Since Alex wasn’t so foolish or clumsy to fall into lava, he shared many of his inventory items and helped craft armor for me again so I wouldn’t be such an easy target for hostile mobs.
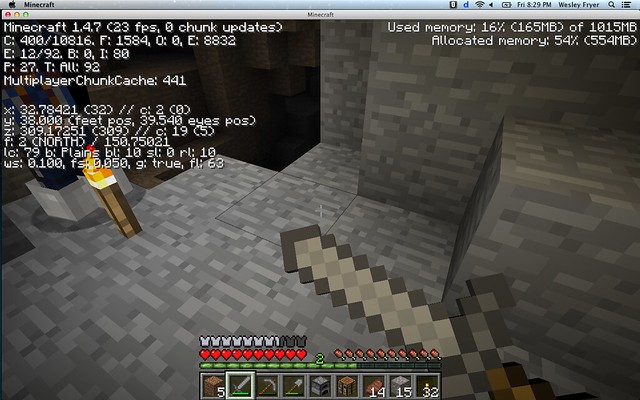
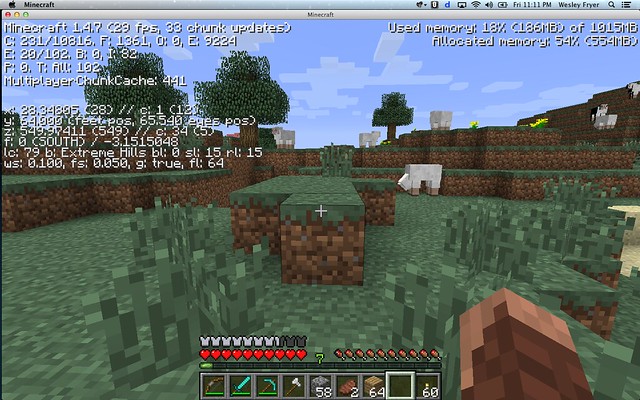
One of the important things Alex taught me this weekend playing Minecraft was about geographic coordinates in the game. You can view your current coordinates by pressing F3 on your keyboard, which on my Macbook Air laptop requires holding down the FN key and pressing the number key at the top for F3. There are x, y and z coordinates which tell you where you are in your Minecraft world. In the screenshot below, you can see the coordinates for where we built our first underground bed. You don’t have to build separate beds to change your spawning location, you can both sleep at different times in the same one. Unlike regular coordinate grid geometry, which would have the “z axis” as the depth direction, in Minecraft your depth is indicated by the “y axis.”
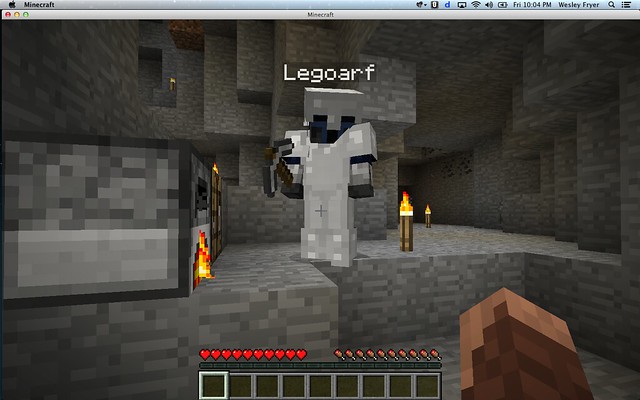
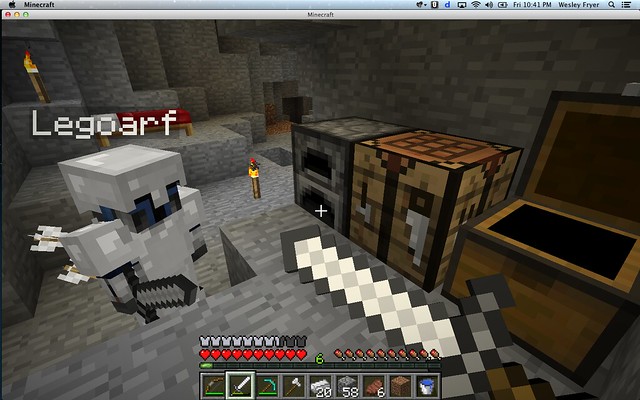
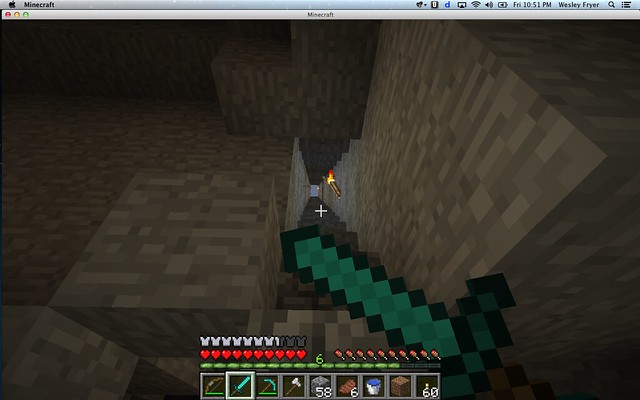
You want to mine deeper because you only find diamonds deep below the surface. In the two previous screenshots you might have noticed I had a metal and stone pickaxe. In the screenshot below, you can see I have a diamond pickaxe which is much stronger but requires that you find diamonds below the surface to craft it. You can also tell that we’ve been fighting some hostile mobs, since Alex still has some arrows stuck in his armor that some skeletons had shot at him.
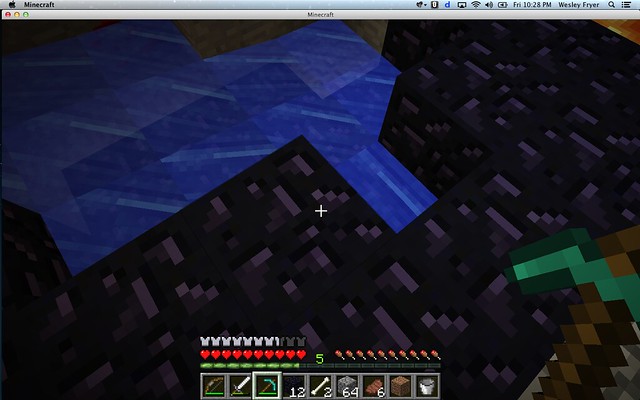
Once you have a diamond pickaxe, it’s possible to mine obsidian. Alex taught me you want to pick up a water source and relocate it by the obsidian, however, because generally there is lava under obsidian.
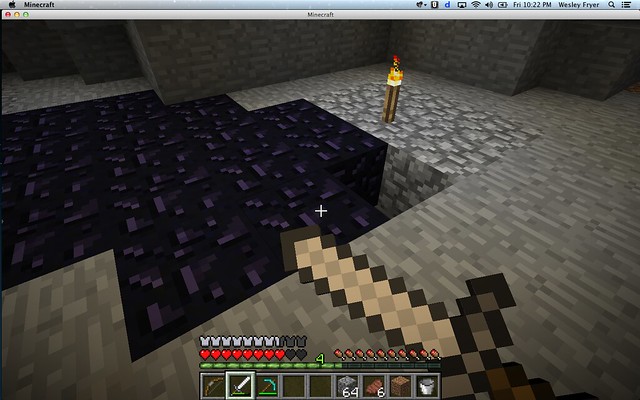
If you have a water source next to the obsidian you mine, then it flows into the spaces you mine out and you can pick up the obsidian. Otherwise the obsidian you mine could fall into the lava below and you’d lose it.
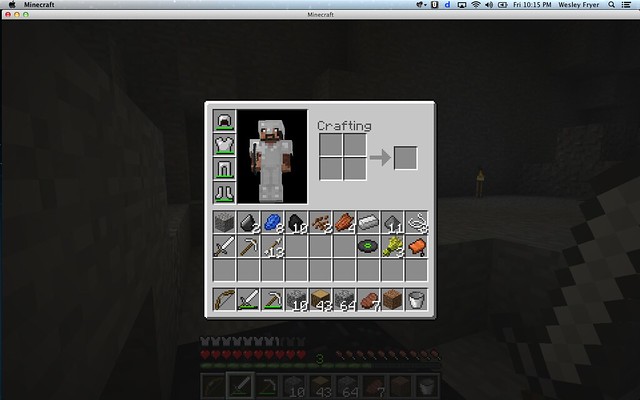
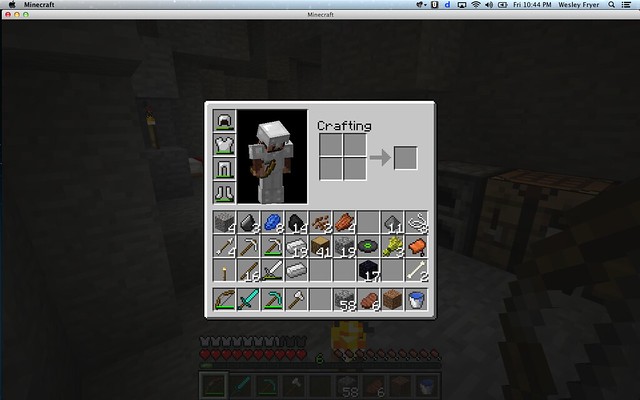
In the screenshot below you can see how I’ve got my full complement of metal armor, which Alex crafted for me, as well as my bow, sword, and diamond pickaxe at the ready in my “inventory hot bar” at the bottom. You can switch between these items by selecting their number (1 through 9) and that’s handy when you have to fight mobs. Alex taught me how to use my bow and shoot arrows, which is very handy for engaging mobs at a safer distance than required for a sword. When you have your bow selected, you point it by moving your cursor with the trackpad and then hold down the Command key (on a Mac) to ‘charge’ the bow. Then release the Command key to shoot. This is one of the shortcut key changes Alex taught me to do do in SETTINGS the first time we played. It’s his preference to set the “Command key” to be the “Use this Item” instruction in Minecraft.
Another smart tip Alex showed me was how to craft a chest so we could leave some crafted items in it next to our bed.
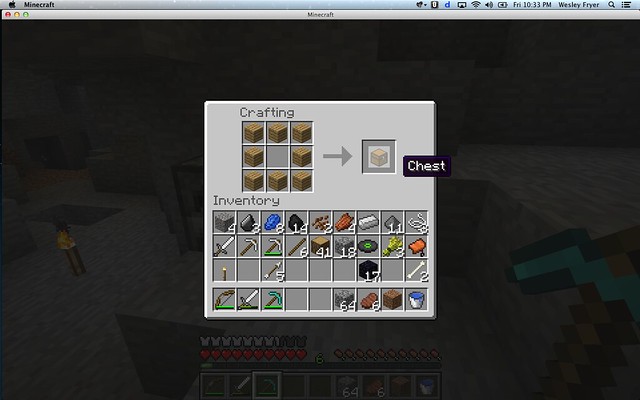
This was preparation in case one or both of us die. When we regenerate, we’ll spawn back in the location of the bed. If we leave a sword, pick axe, and other items in the chest, we can immediately add them to our inventory to get back in the game as soon as possible with needed equipment.
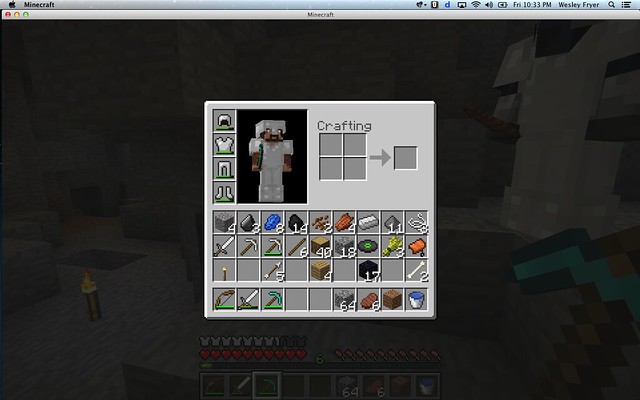
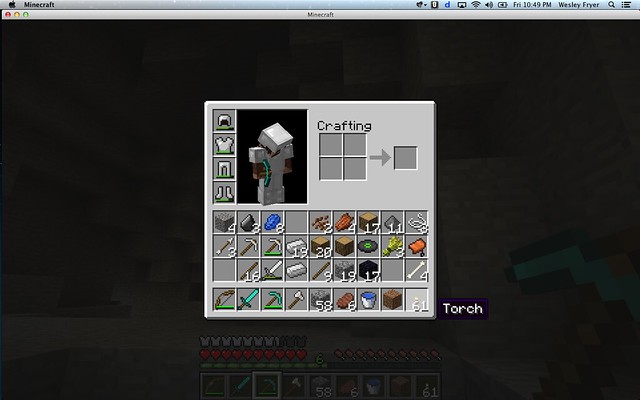
Here’s another shot of my inventory, which also included an axe I made and a bucket, which I filled with water.
This is my full inventory, including torches which I learned how to craft with wood planks and coal. It’s vital to put torches underground as you explore, to show where you’ve been, light your way, and also inhibit the spawning of hostile mobs which (in some cases) avoid the light.
Eventually we decided to go up to the surface to look for a village and start building some things there. Alex started making a stairway to the surface, which you can really make anywhere although you don’t know what kind of mobs, abandoned mineshafts, or caverns you’ll run into.
Here you can see Alex has completed the stairway to the surface, because you can see blue sky at the top.
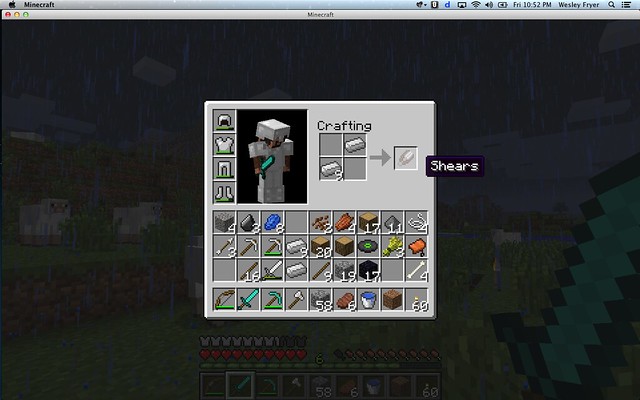
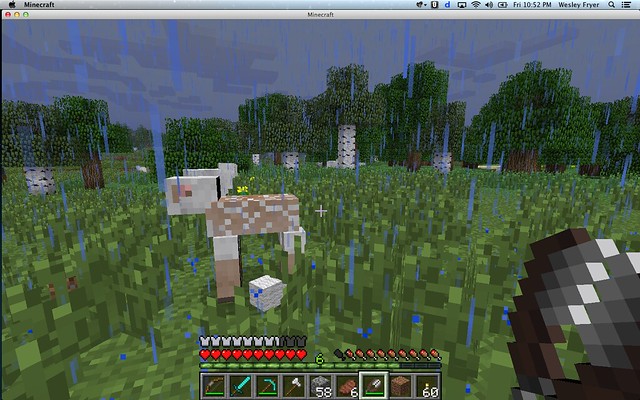
Once we got to the surface, one of the first things I did was craft some shears so I could get wool from sheep that were around.
After using the shears on a sheep, you can pick up the wool. You can get 2 or 3 pieces of wool from a sheep if you shear them, I think you only get 1 if you kill them with your sword.
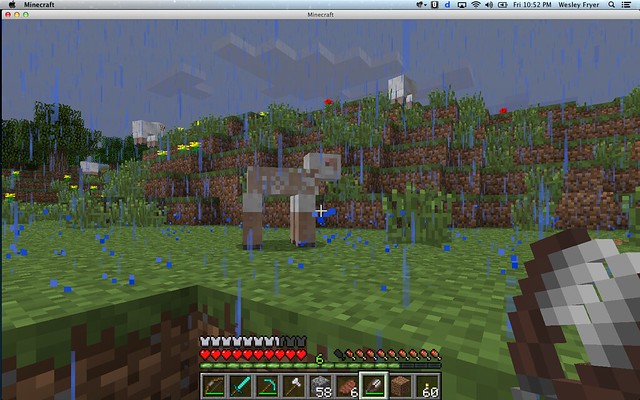
You can see the shorn wool next to this sheep, which I picked up next. It was also raining at the time I took this screenshot.
Now that I finally had some wool, I was able to craft my own bed and sleep in it overnight. Thus my regeneration/spawning location was again changed from underground to this new location on the surface of our world.

The location where we were was called “extreme hills.” We were looking for a village.
This is a screenshot of a coastal area when we were approaching a “witch’s hut.” Alex said he’s never seen a witch actually spawn in Minecraft yet.
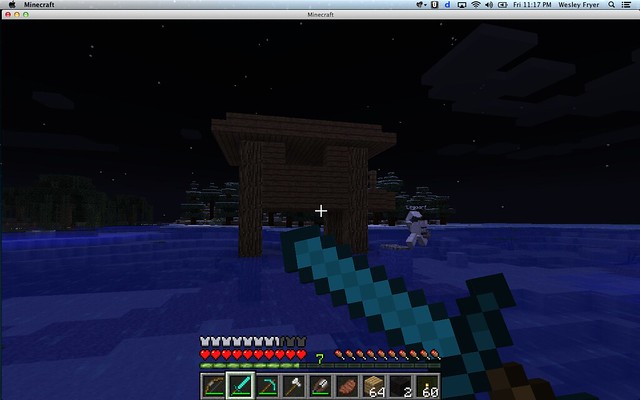
I took a screenshot to note the coordinates of the witch’s hut. (By pressing F3)

Those were the highlights of our Friday night Minecraft adventures. It was really fun (again) to learn so much from my son, and experience together the excitement and adventure of exploring new virtual spaces.
Minecraft is a wonderfully complex and engaging place to explore and build. It’s certainly great to have a “guide,” as I did, who is both experienced and knowledgeable about the environment we’re exploring together. Alex is my “Minecraft Sacagawea.” Unlike the statue below, however, he’s got his own sword and HE is in the lead with me following behind. 🙂


Technorati Tags: minecraft, lesson, lessons, learned
If you enjoyed this post and found it useful, subscribe to Wes’ free newsletter. Check out Wes’ video tutorial library, “Playing with Media.” Information about more ways to learn with Dr. Wesley Fryer are available on wesfryer.com/after.
On this day..
- Managing Digital Footprints – for grandparents (March 2014) – 2014
- GeoMap: Google Maps Engine Lite Hiroshima Project – 2014
- Podcast305: Science Education from a Technology Leader’s Perspective by Dr. David Thornburg – 2009
- Preliminary Report of a National Survey of School Leaders on the Use of Web 2.0 in Schools – 2009
- Science Education from a Technology Leader’s Perspective by David Thornburg – 2009
- K12 Horizon Report (CoSN 2009) – 2009
- The Challenges of Web 2.0 by Bob Martin – 2009
- Spinning history and the means of publication – 2008
- Debating Ataturk, more bans on user created content – 2007
- PictureAustralia with Flickr – 2006