I spent most of the day today editing, normalizing, uploading and publishing 30 conference audio recordings from the October 23-24, 2015, Write Well, Sell Well Conference for Writers in Oklahoma City. This is something that’s been hanging over my head for the two months since the conference ended, so I’m very glad to have this all finished. The last two years I recruited my son to help with audio recording and publishing the conference sessions, but this year he had to take the ACT during the conference so he couldn’t help out. In this post, I’ll review the key parts of my workflow which made this potentially herculean task much faster and easier. See my April 2015 post, “Conference Podcast Recipe and Workflow,” for similar documentation of this process I followed for another conference last spring.
The Write Well, Sell Well Conference is a small conference, and has been hosted by Crossings Community Church in Oklahoma City at their Community Center the past three years. This was our first year to be in their brand new community center, and it’s a very nice facility. We had a maximum of three simultaneous breakout sessions going at one time, so I just needed three different battery operated, digital audio recorders to record all the sessions over two days. Sessions ranged from 45 minutes long to two hours long. This year I was successfully meticulous in documenting the recorder I used for each session, and using a separate recorder for each room. This REALLY helped my workflow in tracking my progress processing all these audio recordings.
As I did with last year’s conference recordings, I used Auphonic‘s server-based audio processing service to:
- Add a 30 second introductory audio bumper to the start of each audio recording
- Normalize the audio from each recording (so the audio level is relatively constant, even when presenters wandered from the podium where the recorder was positioned)
- Compress final audio files as a 32 kbps MP3 audio file
Auphonic‘s services aren’t free, but they are well worth the cost. In addition to normalizing and compressing the audio, it also lets users create “presets” which include the meta information for the podcast files and the podcast show art. I can do this manually with iTunes, but it’s MUCH easier and faster (with far fewer steps / clicks) using Auphonic. I had to purchase about 30 hours of processing time credit from Auphonic for this year’s conference. Prices vary depending on purchase volume, but this worked out to be about $2 per hour or $60 total.
I also uploaded the audio files to Amazon S3, since their podcast file hosting costs are SO inexpensive. I now host almost all my audio podcasts on Amazon S3. I then linked the individual audio MP3 files to a password-protected page on the conference’s WordPress website, and created an RSS feed for podcatcher subscription using FeedForAll for Mac software.
This was my workflow recording each session at the conference:
- Insert a new battery into each audio recorder at the start of the day.
- For each session, start the recorder and state the date, name of the session, and presenter’s name.
- Record on my master schedule sheet (a paper copy) the audio recorder number I used.
- Put each recorder on the HOLD setting, and then set the recorder on the podium where each presenter was speaking.
- Stop the recording at the end of each session.
To be setup for editing and publishing, I needed to do the following things:
- Record a 30 second introductory audio bumper to use at the start of each recording (I used the free Ferrite Recording Studio app on my iPhone to do this, uploaded the file to Google Drive from the iPhone app, then downloaded it to my laptop and uploaded it again to my webserver using the file manager within CPANEL.)
- Create an account with Auphonic and purchase audio processing credits.
- Create an Auphonic preset for the conference recording series. This includes the introductory audio bumper, the podcast show art (both of which need to be hosted online, on another website other than Auphonic) and other meta information and compression settings. This is where I specified I wanted the audio normalized and compressed as a 32 kbps final MP3 file.
- Create an account with Amazon S3 and a unique “bucket” for the podcast files. I have created subdirectories within the bucket for last year and this year’s conference session recordings.
- Create a new page on our conference WordPress website for the conference recordings. This year, our organizers want to consider different ways to potentially monetize the recordings, so for now it’s a password-protected link. This is a simple post visibility option in WordPress.
- Copy the presentation titles and presenter names from the presentation schedule page.
- Copy all recorded WMA audio files from the recorders (yes, they are older Olympus models that don’t directly record to MP3 or WAV/AIFF) to my laptop.
- Convert the WMA audio files created by my recorders to 128 kbps MP3’s using WMA to MP3 Pro. ($2) The app supports batch processing, so this is a pretty quick process.
This was my workflow to edit, normalize, and publish each individual audio recording from my MacBook Pro laptop:
- Create new folder to contain session audio resources, and move the MP3 audio file into it.
- Verify the MP3 audio file was the correct session by listening to the first 15 seconds of it, when I stated the date/title/presenter, in the Finder.
- Open the MP3 audio file in Audacity.
- Trim the opening audio and ending audio from the recording, before the presenter starting speaking and after the final applause on the track.
- Save the trimmed audio file as an Audacity project file.
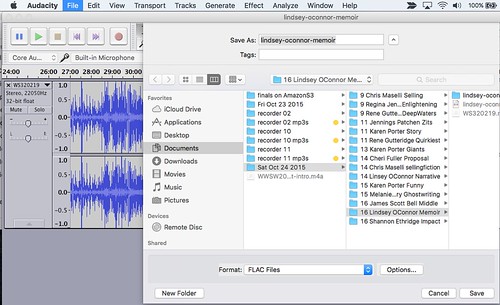
- Export the trimmed audio file as a FLAC file (this is a lossless compression format, and has smaller file sizes than WAV or AIFF)
- Upload the edited FLAC file to Auphonic using the preset I configured earlier. I copied and pasted the unique session title into the settings before uploading.
- Wait for the file to upload, without closing the Chrome browser tab. This could take awhile, since some of the longer recordings were almost 500 MB as FLAC files. The final 32 kbps MP3 files, however, were all in the 10 to 20 MB range, which is very reasonable for people to download even over cellular data using 4G/LTE connection speeds.
- Wait for the file to process and compress online. The time required varied, depending on the file size as well (I assume) the current load on the Auphonic servers.
- Download the final MP3 audio file.
- Copy the MP3 file from the downloads folder over to the folder I created for all finalized audio MP3 files.
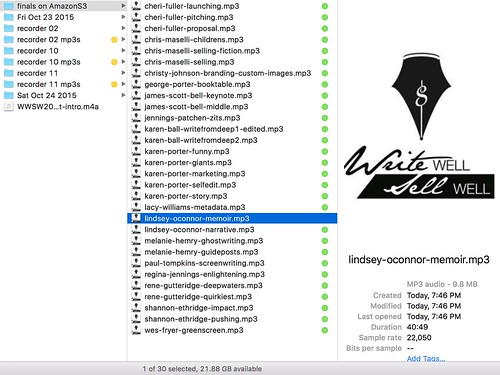
- Upload the MP3 audio file to the correct bucket and folder on Amazon S3. (After uploading, I secondary-clicked the final file in the folder to give it a GREEN label. This helped me keep track of which files I’d already uploaded.)
- Make the MP3 audio file on Amazon S3 “public” so others can download it without a login or password. (A password is just required to access the webpage of audio recordings, not individual files.)
- Copy the link to the Amazon S3 hosted audio file.
- Test the link’s public accessibility by opening it in an “Incognito” Chrome window.
- Paste the link below the session title and presenter name, on the WordPress recordings page. I also made the actual session title and presenter name a link to the MP3 file. By pasting the direct link, WordPress auto-embeds a player making it easier for people to play the audio files in the browser window. I prefer using the PodLove WordPress player, since it can show total / elapsed time and some other features, but it’s simpler to just use the default WordPress MP3 embed. It is also smaller so it takes up less space on the webpage.
After repeating these 16 steps for all 30 audio recordings, I used FeedForAll for Mac software to create a subscribeable RSS feed for all 30 recordings. That XML file didn’t work in my PocketCasts iPhone app, so I used Feedburner to create a podcast-friendly feed and then linked that from the password-protected conference recordings page. That worked great in PocketCasts, so I could speedily and easily download the episodes I missed at the conference or want to hear again. There were some GREAT presentations at the conference last year!
This was a lot of steps, but it was FEWER than if I’d done all of this using iTunes rather than Auphonic. If you have suggestions or alternatives which could make this process more streamlined, faster, and less expensive, I’d love to hear them! Please share via a comment here or a Twitter reply to @wfryer.


