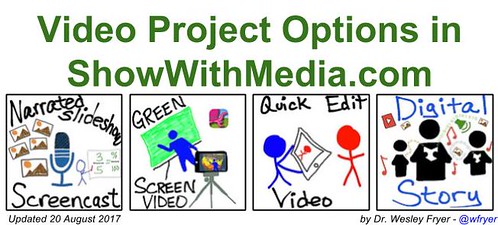
Documenting and sharing your learning is essential and should be a regular part of the classroom lesson cycle. (Design – Create – Share – @digishare) Video is a powerful narrative media, and is featured prominently in the “Show with Media” digital literacy framework: As narrated slideshow/screencast projects, green screen videos, quick edit videos, and digital storytelling projects. WeVideo (@wevideo) is a very capable, web-based video editor which students using Chromebooks or other laptop computers can use to edit and share video-based media projects. In this post, I’ll share a few of my lessons learned using WeVideo and offer some recommendations if you choose to use it with students.
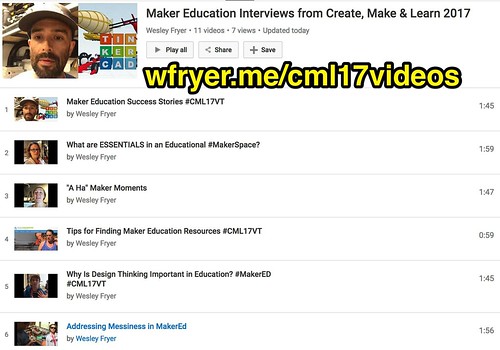
This weekend I used the website WeVideo and an educational license to edit and publish 9 more videos from the Goose Chase Media Scavenger Hunt I helped facilitate a few weeks ago at the Create, Make and Learn Institute in Burlington, Vermont. (@GooseChase) Since WeVideo is a full-featured, web-based video editor comparable in most features to iMovie for iPad, I was able to trim clips, add text titles at the start and end of each video, and even add some green screen special effects. I added these videos to the two I’d previously created to a YouTube Playlist I named, “Maker Education Interviews from Create, Make & Learn 2017.”
Before sharing some WeVideo lessons learned and tips, however, I’d like to list and link the individual video titles I edited and published from CML 2017. I led the first two days of workshops in the “Making Media” strand at the Institute, and the second day focused on video editing using WeVideo. All the resources from my workshops are included in this public Google Doc. It worked great to use GooseChase to encourage participants to record short video clips on our first morning together, which we used to create video compilations. We made it clear to participants at the outset that:
- They did NOT have to be recorded in videos or photographed in selfies during the Goose Chase. Being a subject in videos and photos was optional.
- We would (most likely) use submissions later in combined videos we would publish publicly on YouTube.
Here are the eleven videos, which were each based on a “mission” or question prompt during our Goose Chase scavenger hunt. Please use and share these with your own students or other teachers involved in MakerSpace projects or STEM/STEAM activities. Many thanks to Sarah Sutter (@edueyeview) for helping brainstorm these questions with me at the start of the institute!
- Maker Education Success Stories
- What are ESSENTIALS in an Educational #MakerSpace?
- “A Ha” Maker Moments
- Tips for Finding Maker Education Resources
- Why Is Design Thinking Important in Education?
- Addressing Messiness in MakerEd
- Integration Ideas from Create, Make and Learn 2017
- Burning Questions at Create, Make and Learn 2017
- Environmental Concerns in Maker Education
- Interesting & Exciting at Create, Make & Learn 2017
- Maker Education Concerns at Create, Make & Learn 2017
Here are some of my lessons learned using WeVideo.
Short Clips Work Well
Goose Chase allows a maximum length of 15 seconds for individual video missions. This worked well for WeVideo edited movies, since they uploaded quickly to the website. They also created interesting compilation videos, since the subjects changed at least every 15 seconds. Obviously there are many other kinds of video projects to make besides compilated interviews, but these projects could be replicated with different questions and used for similar professional development or for curriculum-related student projects.
Create Topical Media Folders
It worked well to create separate media folders for each question and video project. This allowed me to select all the videos for each topic (usually ten different clips) and drag them together into each video project. I recommend using a similar clip organization strategy for any WeVideo project you make.
Export at 720P
When you finish editing a WeVideo project and click FINISH, you have the option to export the final video at 480P or 720P. I definitely recommend the larger size. The resolution of the the final video is better, and the file size is not ridiculously big. All of the videos I created for this project were 2 minutes or less in duration, and the 720P exported versions were less than 25 MB in size.
Zoom and Move Green Screen Clips
When you are editing clips in a WeVideo project, it can be handy to zoom and move clips which do not completely fill the screen. This was true of the video clips submitted in our Goose Chase scavenger hunt. As you’ll see in several of the edited videos from this project, like “Maker Education Success Stories,” I chose to use a related background image in an underlying WeVideo layer to add visual information and reinforce what the person being interviewed was saying. This is possible in WeVideo because when you double click an individual clip in a project, you can then drag as well as resize it as desired in the preview window. This technique was also helpful because some of the groups didn’t completely fill their video background with a green screen when they were recording. Those parts of the screen, since they were not covered with green, did NOT become invisible / transparent when the green screen effect was applied. By resizing and moving the clips, however, I could move those opaque parts of the green screen video outside of the final video frame.
Upload to YouTube
Although WeVideo does provide links to hosted versions of final video files, I uploaded each one to my YouTube channel. I recommend uploading to YouTube because it seems likely at this point that Google will continue to provide free video hosting on YouTube into the foreseeable future. (Whatever that is.) I hope WeVideo remains a profitable and innovating company forever too, but the fact is we don’t know how their policies about hosting video content may change in the future or if hosting will be cancelled if I don’t renew my educational license. YouTube videos will continue to be hosted by Google for free regardless of my WeVideo subscription status or the financial condition of WeVideo as a company.
Add Green Screen Effects Last
I recommend adding green screen effects to your WeVideo movie projects last, since the still images or video background clips inserted below do not automatically move when you insert a text intro sequence or other clip earlier in the project. I do REALLY like how WeVideo clips “magnetically snap” into place next to other clips, avoiding unwanted gaps between them. This means if you don’t add green screen effects last, it’s relatively easy to move the underlying media clips as desired. It’s easiest, however, if you add the green screen effects last. Remember this video tutorial from WeVideo in June 2017 is a good one to use to learn green screen techniques and also share them with your students.
If you have not already, I strongly encourage you to give WeVideo a try! If you use a free account, however, you will have some limitations. These include NOT being able to add green screen effects. You must have a paid subscription to make green screen videos in WeVideo.
Please let me know if these lessons learned and suggestions are helpful to you and/or your students by sharing a comment below or sending me a reply to @wfryer. Good luck creating and sharing edited videos with WeVideo!


Comments
One response to “Web-based Video Editing with WeVideo (Including Green Screen)”
I have a paid WeVideo account. I love it. In addition to uploading clips, I can screencast and add voiceover to still shots. The price is affordable, and I don’t have to bother with keeping software up-to-date.