
This past fall when discussing 1:1 computing options at an educational technology conference, I asked an Apple rep the reasons schools should choose Macbooks over netbooks at this point. The person’s three part response was:
- Netbooks have weak batteries that won’t last more than two hours.
- Netbooks are flimsy / not rugged and won’t stand up to continual student use.
- Netbooks are underpowered, therefore you cannot do anything creative on one.
Although I did not say so at the time, my thought in response to these assertions was that none of these statements are accurate. Certainly some netbooks may have two hour batteries, but some of the netbook reviews on Consumer Reports show effective battery life of six and seven hours on a charge. As far as durability, it seems a little early to make that prediction with certainty. The third point was the one which really surprised me, however. Can’t do anything creative on a netbook? Really? Having become a Google Certified Teacher this past summer, I knew that wasn’t true. There are an amazing array of creative, powerful things which learners ARE doing and CAN do right in their web browsers, whether they are using a netbook, full-sized laptop, or a desktop computer.
What about multimedia creativity, however? I knew netbooks are regarded as underpowered by full-sized laptop standards, but today’s “underpowered” processor would have been a comparative rocket of speed just a few years ago. To find out if it is possible to successfully create multimedia on a netbook, I decided to give it a try this weekend with my Dell Mini10 and Windows7 Home Premium. Using a Sony DSC-950 Digital Camera, which shoots 320 x 240 pixel video, along with Windows Live Movie Maker (free downloadable software included in Windows Live Essentials) I created another episode today for “The International Cooking Show” project. Yesterday, I used my iPhone and iMovie ’09 to demonstrate how to prepare Yodler’s Fondue. Today, I demonstrated how to prepare “Huevos a la Mexicana,” or Mexican Eggs, using Redmond’s latest free video editing tools.
I was interested in using the Sony DSC-950 camera because it is the one we’ve included in the “digital backpack” for Celebrate Oklahoma Voices workshop participants in the past year. My conclusion after working with Windows Live Movie Maker is that the program still doesn’t have all the power and ease-of-use of iMovie (in any of its past or current variants) but is a BIG step forward in many ways from its Windows Movie Maker predecessor. The video quality of the Sony digital camera isn’t as good as my iPhone GS, but it also was a $125 camera compared to a $500+ smartphone. The biggest missing feature I didn’t find in Windows Live Movie Maker is the option to speed up or slow down a movie clip, like you can do easily in iMovie. Here’s a quick overview of what I did and learned using Windows Live Movie Maker today.
First of all, it’s important to know Windows Live Movie Maker requires either Windows 7 or Windows Vista. That eliminates 100% of the schools in Oklahoma currently who run Windows-based computer systems. I don’t know of a single district which upgraded to Windows Vista in past years. For schools purchasing new laptops (including netbooks) for students as part of our state’s TitleIID ARRA grant program, however, Windows Live Movie Maker may be an option. I’ll be interested to see what kind of licensing deals Microsoft offers to schools for Windows 7 upgrades. Given the overall condition of our state’s finances and school budgets specifically, however, I doubt many districts will opt to upgrade any time soon. Newly purchased computers are likely to be the only ones in Oklahoma schools running Windows 7 in 2010.
I made all the screenshots in this post using the free, open source screenshot program Zscreen. Like Skitch on the Mac side, it supports direct uploads to Flickr. All the Windows apps I’m running on my netbook are listed on wiki.wesfryer.com/Home/winapps.
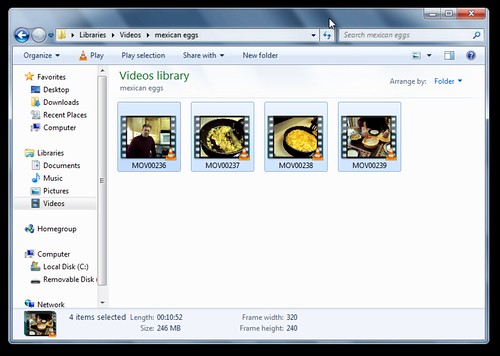
The first step for video editing on any platform is copying the raw movie files from your camera to your computer’s local drive. In this case I copied them into Libraries, Videos, into a new folder I created.
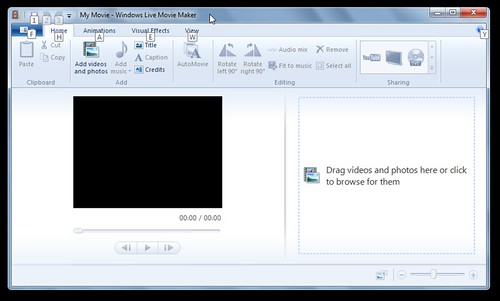
Windows Live Movie Maker (WLMM) has the following splash screen. You can drag movie files into the right hand side of the screen, or click the ADD PHOTOS AND VIDEOS button on the top ribbon of buttons.
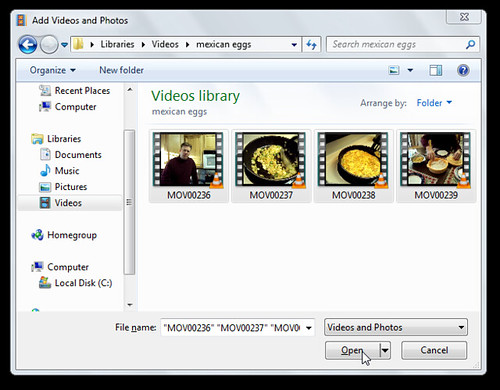
Just as you can in PhotoStory3, you can click on one file and press CONTROL – A to select all the files in that folder. Then click OPEN to import them.
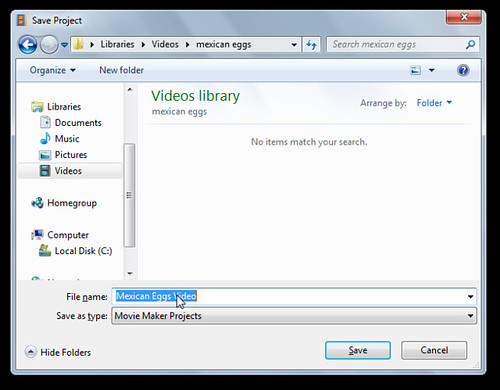
As with any type of multimedia project, it’s a good idea to save early and frequently. The save icon is a floppy disk (kind of ironic at this stage, it seems) in the upper left corner of the program window. I saved my WLMM file in the same folder where I’d copied my camera’s unedited video files.
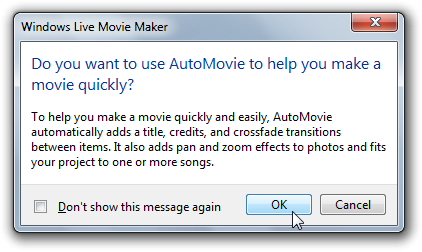
The best feature in WLMM is the “Automovie” button. Click it and the program makes a complete movie with all the media you’ve imported, including titles and transitions. This works with both still images as well as videos.

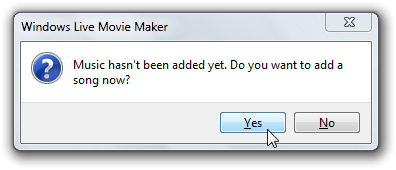
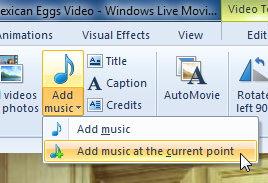
If you have not added background music to your project when you click “Automovie,” WLMM will prompt you for music.
As I did with yesterday’s fondue movie edited with iMovie ’09, I used free royalty free music from incompetech.com for this project. That is one site among many we include in our music and audio resources list for Celebrate Oklahoma Voices.
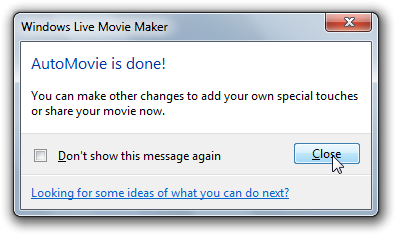
After selecting a music file, Automovie takes just an instant to create “a finished movie.”

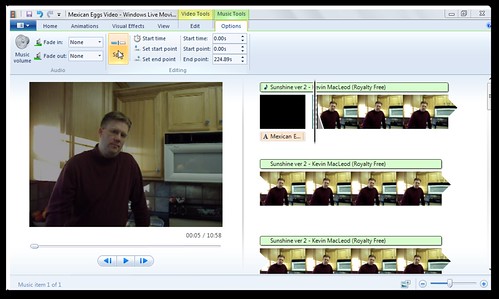
This video can be exported or directly uploaded to YouTube. Today my “unedited” movie was 10 minutes and 58 seconds long, and I needed at least to get the time below ten minutes for a YouTube upload.
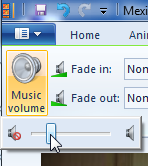
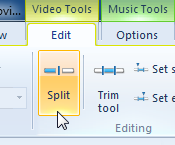
One of the most important menu options in a video editing program is the option to SPLIT an audio or video clip. I first chose to split the inserted music clip near the start of the movie.
I wanted to fade the volume level down, and make the volume level very low so it would not compete with my audio narration. Since my son recorded this for me using a Sony digital camera, which has a very small and relatively poor microphone, this audio level had to be VERY low.
The split option is available in WLMM for both video and audio tracks. Simply select the track you want before clicking SPLIT.
Transitions can be added between split clips.
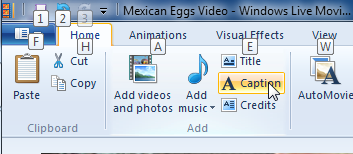
WLMM gives the option to add “captions” to still images or video sequences. iMovie calls these “titles,” whether they are on a solid color or superimposed over images. I added several captions in today’s video, to give credit for my music source as well as share links to The International Cooking Show and our family learning blog.
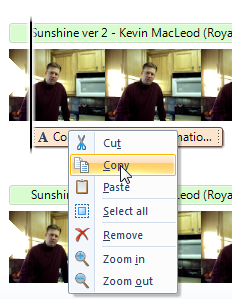
WLMM lets you copy and paste captions within your project. This is handy to replicate the same font, color, and size settings used previously.
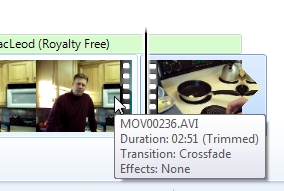
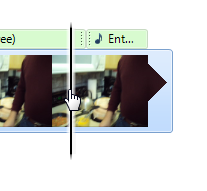
WLMM separates imported video into different segments which are clickable. To move to a specific position in a video clip which is not at the start of one of these segments, click and drag the mouse till “the hand” icon is shown. Then an effect or media element can be inserted/added at that specific location.
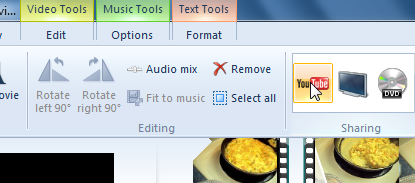
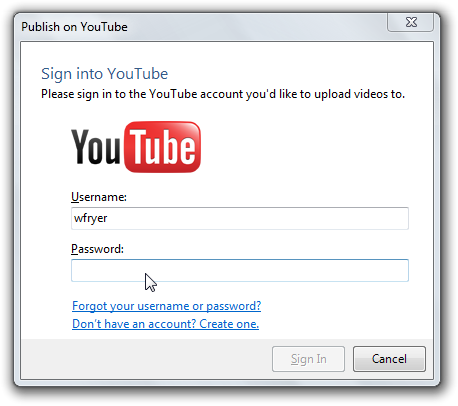
After finishing all your desired movie edits, click the YouTube button at the top of the WLMM window to publish directly to YouTube.
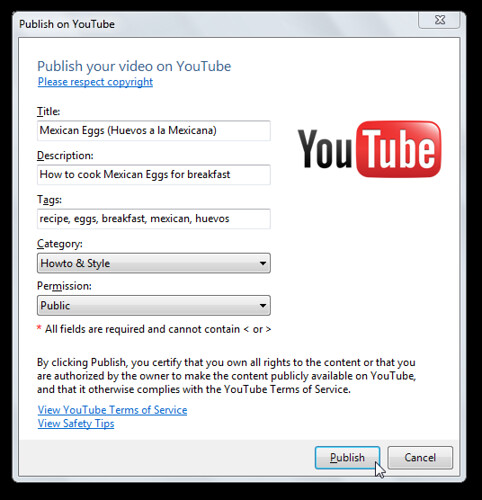
WLMM will then prompt you to sign into YouTube, and enter meta tag information for your video.
The limited processing power of a netbook is most evident at this point, when video is exported and compressed. I think it took about 30 minutes for my Dell Mini10 to export and upload my seven minute video. WLMM exports the video first, and then uploads it.
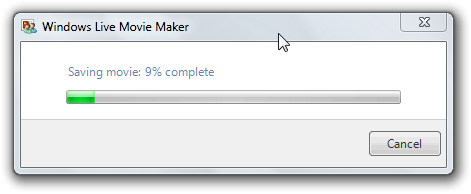
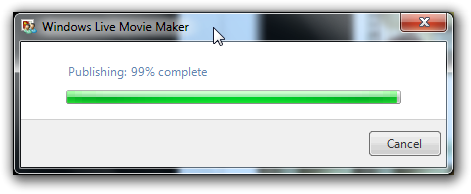
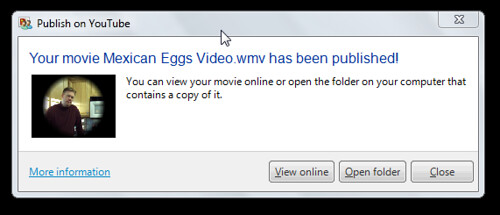
WLMM does save the exported video file locally on your hard drive during the YouTube publishing process.

After the video was published on YouTube, I edited it in Chrome and chose to moderate comments. I’m not expecting any controversies like we saw with one of Sarah’s videos last year, but I’ve decided it’s always a “best practice” to turn ON YouTube comment moderation. For instructions on how to enable YouTube comment moderation, refer to my Screenr screencast published last week. I created this screencast, incidentally, also on my netbook running Windows 7.
Given the option, I will DEFINITELY prefer editing video with iMovie over Windows Live Movie Maker in the future. As with many computing topics, however, I’m glad to have experience and expertise working on multiple platforms so I can share credible opinions with others about them.
I’d certainly never make the claim, “You can’t do anything creative on a netbook.”
Technorati Tags:
apple, creative, creativity, howto, live, macbook, movie, netbook, tutorial, video, youtube, windows, windowslive, essentials, maker, moviemaker, instructions
Comments
2 responses to “Getting Creative with Windows Live Movie Maker on a Netbook”
Wow. That’s a lot of work.
I’ll be in the market for a new laptop soon, so this was helpful with regard to the Mac vs. PC battle going on in my head.
Wes… I appreciate your Windows media challenge. I am a recent convert to the Mac platform (after 15 years of happy Windows bliss) and one of the reasons why I love the platform is how well the parts work together to create media. I know you are also an advocate of Ubuntu on netbooks. I like Ubuntu as a productivity OS, but wonder if you have considered doing the same challenge on an Ubuntu netbook? Perhaps with the Ubuntu Studio version?