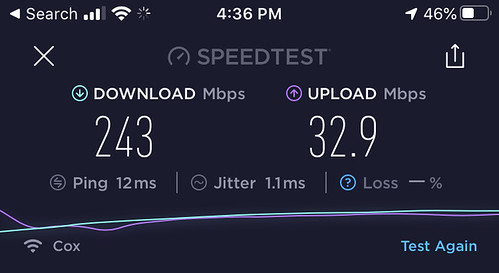
This past holiday weekend our son helped me with a home WiFi networking project I’ve been wanting to do for several months, and the speed benefits are wonderful! We’ve been using three Google WiFi access points (now “Nest WiFi”) for over a year. See my March 2019 post, “Google Mesh Home WiFi Makes our Internet Access MUCH faster” for background. However, only our primary Google WiFi access point (AP) has had a wired connection (it connects our cable modem compatible with our Internet Service Provider – Cox Cable, the rest of the APs connect with “mesh WiFi.”) The primary Google WiFi AP serves as our home router, sharing the Internet connection with all our end-user devices. Our weekend project was running ethernet wires across our house through the attic, so the Google WiFi AP in Alex’s bedroom and beside my COVID-19 “home office” has a faster, wired connection back to our home network hub. Previously, because of the walls in the way, we were never able to get a WiFi download speed over 100 Mbps in those rooms, even though we’re paying Cox for a theoretical max download speed of 1000 Mbps. After installing the “Internet backhaul ethernet connection,” we’re now seeing speeds around 250 Mbps over WiFi in those rooms! In this post, I’ll share some of the ways we completed this project together keeping costs to a minimum, and some lessons learned.
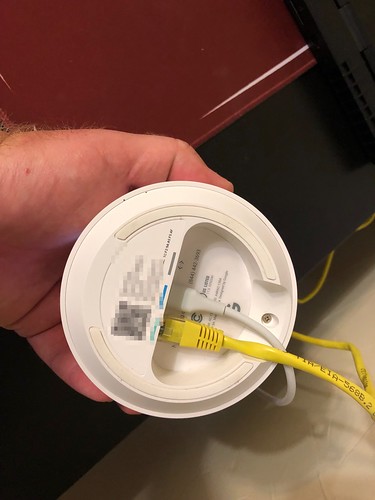
First of all, let’s talk about the kind of Internet router you have at home and your WiFi access point(s). If you haven’t upgraded in the last 2-3 years, it’s time to upgrade. If you want to save money in the long run and have some technical setup expertise, I recommend buying your own router as well as modem instead of leasing one monthly from your ISP. As I explained in my March 2019 post about this, Google WiFi / Nest WiFi is fantastic. It uses “mesh technology” to make multiple radio channel connections between devices to speed things up, and it’s super user-friendly to configure and manage via the iOS or Android mobile app. It took a bit of Googling and YouTube video watching to figure this out, but it turns out you can plug in an ethernet backhaul cable to EITHER of the ports on the back of Google WiFi.
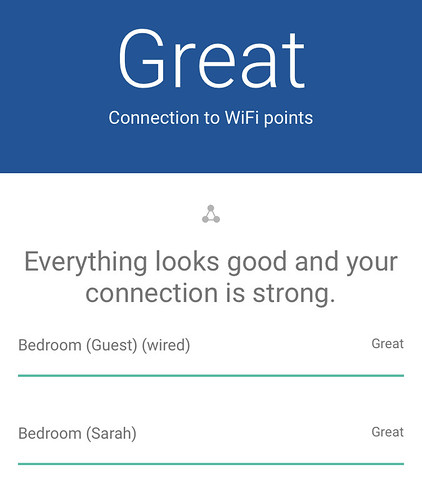
After you plug in the cable, Google WiFi automatically makes configuration changes. The screenshot below of my Google WiFi app shows the “Bedroom (Guest)” AP has a “GREAT” connection after being wired… It wasn’t this good when we were just using WiFi / mesh because of structural attentuation in our house caused by the composition of the walls between that AP and our basestation AP.
If you’re wanting to improve the speed and strength of your home WiFi network to handle MULTIPLE simultaneous connections (and with the likely prospect of at least some “remote learning time” for school next year, everyone with school-age students should be) your first step is to either upgrade to Nest WiFi or Eero WiFi. Then it may be time to run some ethernet backhaul wires, as we did, to make your connections even faster.
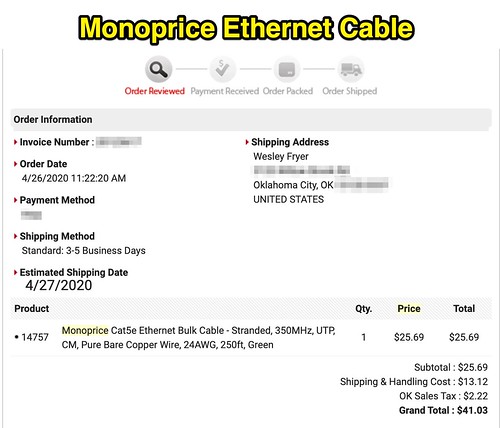
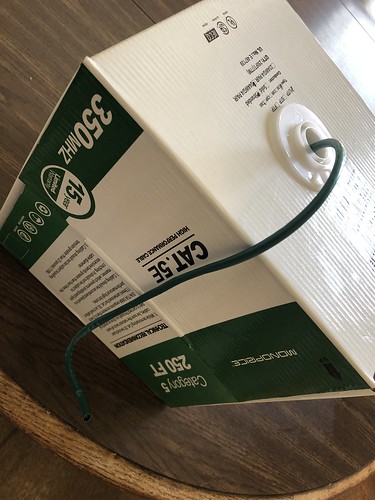
For the actual ethernet cable, I went with “Monoprice Cat5e Ethernet Bulk Cable – Stranded, 350MHz, UTP, CM, Pure Bare Copper Wire, 24AWG, 250ft, Green.” Why green? It was the cheapest. $25.69 for the 250 foot spool, $41.03 with shipping and taxes. You can go with CAT-5, CAT-5E, or CAT-6. All can theoretically handle 1000 Mbps ethernet connections. I went with CAT-5E because the cabling and the connections were slightly cheaper, and I thought CAT-6 might be overkill for our needs.
In terms of pulling the actual cable through our ceiling and attic, I had to purchase an 18″ long, 3/4″ size “spade” drill bit to drill the holes we needed in the ceiling at both ends of our run. It’s been awhile since I ran ethernet cable… as the Director of Technology at our school for 4 years, I did help our network administrator (at the time) run cabling in a few of our buildings… and back in the early 2000s in Lubbock, Texas, in addition to running ethernet wiring in our home I also installed all the cabling in a dental office owned by some church friends. Cabling like this is not technically super-challenging, but the fact that outside air temperatures were in the high 90s Friday meant that our attic was probably around 110 degrees or hotter! So lesson learned, it’s always good to run your attic cabling BEFORE the heat of July hits in North America!
I’ve learned if you’re going to run 1 ethernet cable, it’s generally advisable to run at least one more cable alongside. That provides a backup, and you can often find uses for an additional hardwire connection. We ended up using some old rope to pull through with the first cable, and then after cutting the first run, pulled through a second line with the rope.
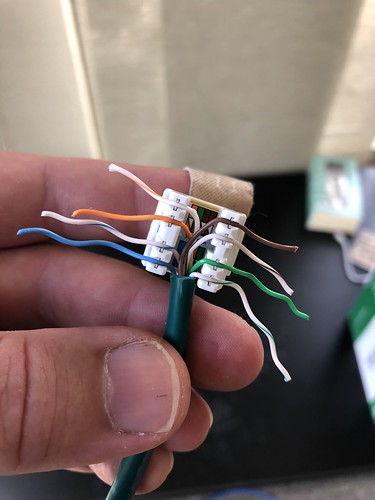
After you run your ethernet wire (and leave sufficient slack for termination) it’s time to punch down your wall jacks. Somewhere in our garage I have an ethernet cable crimper, but I could not find it last time I looked. So, at our nearby Lowe’s I purchased a “Legrand On-Q QuickConnect Phone/Data Punch Down” for $25, the “Legrand 5-Pack Plastic CAT5E Ethernet Wall Jack” bag for about $16, and two matching surface-mount covers. These connectors and crimping tool worked GREAT. I also purchased some surface-mount raceway to cover the cabling. I do know a few folks I might have been able to ask to borrow their networking crimping tool / gear, but it worked out great to just purchase these “Legrand” brand items at Lowes.
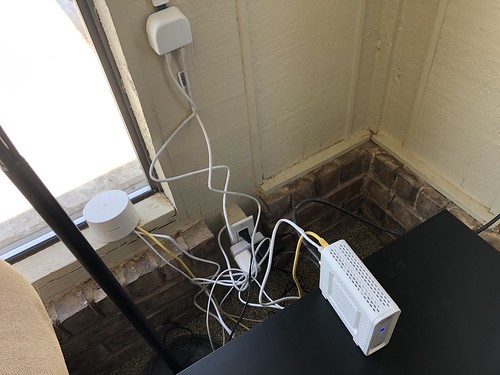
Now that the ethernet backhaul cable is installed, punched down and working, my last step will be to clean up our “corner cabling nest” where our cable modem and base station Google WiFi AP and router sit. The AP could function even better if it was higher in the room. I’ll get my wife to help out with this final, decorative step.
Home Internet and WiFi connections have become as important during our COVID-19 / neo-coronavirus global pandemic as electricity and running water. If you’re working from home and/or have students learning from home (“remote learning”) it is vital your WiFi is fast, secure, and robust enough to handle multiple, simultaneous connections. I am and have been thrilled with the performance of our Google WiFi / Nest WiFi the past 15 months, and the setup is even better now that we have ethernet backhaul to our most distant WiFi AP. I hope some of the information I’ve shared here is helpful to you, and may inspire you to upgrade your own home networking setup. If so, please let me know via Twitter (@wfryer), comment below or via my electronic contact form. Running network data cabling can be time consuming and require the cultivation of new DIY skills, but the rewards can be substantial as we all continue to live and work more hours each day online.
If you enjoyed this post and found it useful, subscribe to Wes’ free newsletter. Check out Wes’ video tutorial library, “Playing with Media.” Information about more ways to learn with Dr. Wesley Fryer are available on wesfryer.com/after.
On this day..
- July PD in OKC: Google Docs, iPad Media Camp & Scratch Camp – 2012
- Storychasing NASA History at Space Center Houston – 2011
- Dell Inspiron duo Convertible Tablet at the Microsoft Store – 2011
- The Marketing Slogans I’d Give AT&T – 2011
- Screentime stats for youth and the Open Learning Exchange via @fastcompany – 2010
- Quickstart guides for Posterous and iPadio – 2010
- More book recommendations about the Middle East and Islam – 2010
- iTunes Account for a Child without a Credit Card – 2009
- 21st Century Skills Our Students Need – 2008
- A Message for my School Board – 2008

