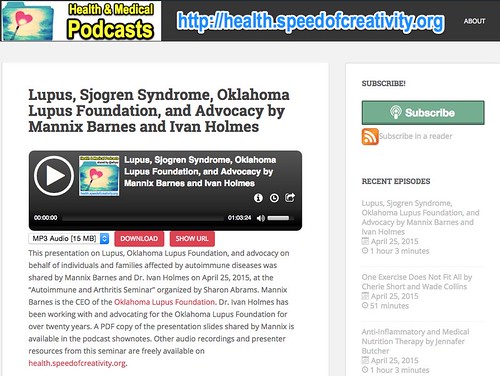
Yesterday I assisted Sharon Abrams, a member of our church in Edmond, Oklahoma, with a one day “Autoimmune and Arthritis Seminar.” I made the coffee, provided AV support for the presenters, and made the four sessions of the day digitally available on a new website I named, “Health and Medical Podcasts.” This process involved capturing presenter sessions with a digital audio recorder, editing each recording to prepare it as a downloadable podcast, and publishing the MP3 audio files on the website along with associated PowerPoint/multimedia presentation files with related links in episode show notes. Sharon is very passionate about getting more information about autoimmune diseases and treatment options out to people in our community, so this opportunity to make the seminar content “web accessible” was and is very exciting for her. I’ve been podcasting and experimenting with lecturecasting for over 10 years now, so this was a good opportunity to apply my digital audio and web skills in a context outside my “normal” K12 and higher education realms. In this post I’ll recap both the “ingredients” I used as well as the workflow to publish these materials online as efficiently and cost-effectively as possible, with a high level of quality.
These steps are MUCH more complicated than necessary if you are creating or helping students create podcasts or radio shows in the classroom. See the “Radio Show” page of ShowWithMedia.com for tool and workflow suggestions for classroom podcasts.
Ingredients
There are numerous ways to publish conference or event audio online, but these are the tools and platforms I used yesterday:
- Olympus WS-321M audio recorders (I have access to several of these AAA battery powered recorders, which plug directly into a computer’s USB port but unfortunately only record in WMA audio format)
- WMA to MP3 Pro software ($2, Mac-only)
- A web hosting account on Site5.com, including CPANEL access (full disclosure: this is an affiliate link)
- A registered domain name (in this case speeedofcreativity.org, which I used to create the subdomain health.speedofcreativity.org)
- Audacity (free audio editing software I used to trim audio recordings, so the starting and stopping points of each recording correspond exactly to the speakers’ presentations)
- Auphonic (a web-based audio normalization, compression and podcast production service. I purchased 9 hours of audio processing time for $11 US)
- MacBook Air laptop
- PowerPoint software (used to convert speaker presentation files into PDF format)
- Amazon S3 account (Used to host both podcast files and presentation files, it’s the most affordable, scalable web content hosting option I’ve found that just costs pennies per month for literally gigabytes of transferred data. I could have hosted these files on my own hosted web server, but Amazon S3 is cheaper and takes the downloading server load off my own hosting server)
- Seashore software (free – used for image editing, this is a Mac-port of the open source GIMP software project)
- Skitch software (free – used for image editing)
- IconArchive.com (free – used to find a freely useable, suitable icon for this new podcast channel)
- WordPress software (free)
- PodLove Podcast Publisher (free WordPress plugin used to create podcast “episode” entries on the website and configure podcast settings / sharing options)
- Textwrangler (free – text editor)
Workflow
This is the workflow I used to publish these conference audio recordings online.
Initial Setup
- I logged into my hosting account with CPANEL and created a new subdomain (health.speedofcreativity.org) on my existing account. Since I pay a monthly fee for a VPS, I can create additional subdomains for free at no additional cost.
- Again in CPANEL, I used the MySQL wizard to create a new database and admin user account which I could use for a new WordPress installation.
- I downloaded the latest version of WordPress.
- Using the File Manager in CPANEL, I uploaded the WordPress zip file, decompressed/expanded it, and moved the files into the root of the new directory.
- In my Chrome web browser, I visited the link for my new website / subdomain and completed the WordPress installation, inserting the database name, userID and password for the admin user I’d created in CPANEL.
- Using Seashore and Skitch, I created a header image for the website along with a podcast channel icon. I found the basis icon for this image collage on IconArchive.com.
- I downloaded and configured the following free WordPress plugins: Akismet, JetPack, and PodLove Podcast Publisher.
Now my website was ready to publish individual conference recording episode files.
Repeated Episode Workflow
For each presentation in the seminar, I used the following workflow to publish audio and other related files / links:
- I used an Olympus WS-321M audio recorder to record presenter audio. I placed the recorder on the speaker podium, with recording turned on, prior to the start of each session, and locked the recording mode ON using the HOLD feature.
- I transferred the WMA audio file from the recorder to my laptop by plugging it in directly. I organize sessions by creating nested folders on my hard drive, with each episodes assets in a different folder.
- I used WMA to MP3 Pro software to convert the WMA audio file into a 128 kbps MP3 file.
- I opened the MP3 with Audacity and trimmed / deleted the unwanted recordings from the start and end of the presentation. I then exported the file in WAV format. (Since WAV is an uncompressed file format, the file size is larger but it avoids having an unneeded extra compression step. I think this improves the quality of the final recording, but the effect might be negligible.)
- I uploaded the WAV file to Auphonic and selected a “production” workflow I’d previously configured. This takes an uploaded audio file, compresses it into a 32 kbps MP3 file, and adds meta information. It also removes noise and normalizes audio levels. This Auphonic production does not use bumpers (audio intro or outro files) and does include a little meta information. I added the episode title and description, which I composed in Textwrangler. (My favorite free text editor for the Mac.)
- After waiting a few minutes for the online file post-production to finish, I downloaded the final version as a MP3 file and then uploaded it to a “bucket” (folder) I created for the podcast channel on Amazon S3.
- On my WordPress site, I clicked to create a new “Episode” (available thanks to the free PodLove Podcast Publisher plugin) and added the episode title as well as description. I added appropriate tags, and also copied/pasted the episode file “slug,” which is the filename without the extension. The Podlove plugin automatically inserts the webserver file path and appends MP3 for the file extension, after you setup the podcast channel settings correctly along with an “audio asset” option. I also entered the episode duration, which I found by viewing the Auphonic-produced audio file in my Mac laptop’s Finder. Lastly, I added any related files or links as episode shownotes. If presenter PowerPoint slides were available, I converted them to PDF and uploaded them to Amazon S3 first, so I could copy the link from there to insert into the shownotes.
- I published the episode on the website.
Notes and Tips
As I noted at the start of this post, it is NOT necessary to go through so many steps and procedures when you’re creating a classroom podcast or radio show. Tools like Spreaker can dramatically streamline the podcast production process. When you want to create a more customized and professional podcast, however, with files you physically control on server space you lease (versus using a 3rd party platform which might or might not last, i.e. Posterous, Gabcast, Cinch – now CinchCast, etc.) these steps might come in handy.
It was nice that the quantity of sessions I wanted to record and publish yesterday was relatively small, so I was able to complete all the post-production editing and publication steps at the church before I went home. This is a big contrast to the last conference I helped record and publish in its entirety, the 2014 Write Well, Sell Well Conference. Those 14 recordings took around 5 or 6 hours to edit and publish.
I was initially going to publish these conference audio recordings using the free / open source software platform Podcast Generator, but ran into problems with it because of my hosting server’s 10 MB upload limit using PHP. This is a configuration setting I do not know how to directly change, and would have to work with my web host to alter. Check out my website, “Stories of Christian Faith,” for an example of a Podcast Generator-created audio website.
If you find any of these tips, tools or suggestions helpful, please let me know by sharing a comment or tweeting me @wfryer. I am an avid podcast listener as well as creator, and love encouraging and empowering others to create their own podcasts / radio shows! My best and most updated podcast creation resources and links are on the “Radio Show” page of ShowWithMedia.com.
If you enjoyed this post and found it useful, subscribe to Wes’ free newsletter. Check out Wes’ video tutorial library, “Playing with Media.” Information about more ways to learn with Dr. Wesley Fryer are available on wesfryer.com/after.
On this day..
- 1000 Starships to Mars Every 2 Years – 2022
- My Hail Story – 2013
- The Portable $500 LED Projector I Want – 2013
- Lessons Learned Following Oklahoma School Beating Amplified by Social Media – 2012
- A Call to Action: Waging a War to Save our Republic – 2011
- Using Copyright-friendly Images Effectively in Presentations – 2011
- Embedding a Google Document in a Google Site Page – 2010
- Powerful Stopmotion video on Children’s Rights – 2010
- links for 2008-04-26 – 2008
- Building 21st Century Learners by Kevin Honeycutt – 2007


